Showing posts with label DIY. Show all posts
Saturday, August 20, 2011
Dollar Tree Organizer: DIY Jewelry Holder
Tuesday, July 26, 2011
Easy DIY Camera-Purse-Tote
My ideal tote, found at Marshall's.
If you can sew a pillow, you can turn your favorite purse into a camera tote. I'm attending Blogher next week and I wanted to have a tote where I could fit:
- DSLR
- Flip Cam
- Extra Lens
- Business Cards
- Phone
- Notebook/Pens
- Netbook
Supplies:
- Your ideal bag (make sure it's big enough for what you want to hold and it's comfortable while on and full of items)
- 1-2 yards of favorite fabric (the fabric above is from Hobby Lobby)
- Sewing Machine
- Foam ( I used Airtex 1 inch foam from Joann's http://bit.ly/qtZwpC)
- Hot Glue (hey, don't judge! I like things easy)
- Measuring Tape
- Velcro
Here is my easy peasy not so detailed tutorial:
- Take the measuring tape and measure out the inside of the bag where your foam inserts will be.
- Cut foam according to your measurements.
- Take the fabric and fold it over the foam, leaving 1/2 inch for slack to sew.
- Cut fabric to desired size.
- Flip inside out and sew like a pillow case (3 sides)
- The foam should fit snug in the cases, then you have two options.
- You can hand sew it shut or do the "Cheater" method of using a hot glue gun.
- I just folded the remaining end like a present and carefully hot glued the ends.

- Repeat this for all the inserts you desire.
- Then take no-sew velcro and measure how two strips by width of your two largest foam pieces.

- Then take your "inside" inserts and place velcro lengthwise. This makes it easy to reposition just remember if you hot glue them instead of sewing them, they are vulnerable to come off.
- Done! It's really simple, and you can do this with any bag in less than 2 hours.
Friday, July 1, 2011
DIY Lego Pinata and a Party Favor
The Lego Pinata!
This was pretty easy (well for me, I had my fiancee do the hard work). Supplies:
Diaper Box (base)
Mod Podge
Dixie Cups
Curling Ribbon
Staple Gun
Diaper Box (base)
Mod Podge
Dixie Cups
Curling Ribbon
Staple Gun
I used a diaper box for the base of the pinata. We then took Mod Podge and pasted 3 coats of red tissue paper on the box.
For the "bumps" we used Dixie cups and covered them in Mod Podge, then adhering them onto the top. Mod Podge is great, extremely sturdy and dries clear so you don't have to worry about a white glue mess on your final product.
I then cut a square out of the bottom to fill it. I then stapled curing ribbons to create pull strings for the kids and just had the kids pull all the strings at once (I mean really they only care about what's inside).
I found these "brick" candies at a local candy store but you can buy these online at Amazon.com
I used the Lego Thick font and printed the sayings out on yellow cardstock.
I just happened to stumble upon the Lego stickers at Walmart on clearance for only $.25. It was a killer deal!
The party bags were really easy, since we went with an everything boy party idea, I used my Cricut to create these robots to adhere to the bags:
The cartridge I used was the Birthday Cakes cartridge (Cricut Cake Cartridge, works in all Cricut machines). I bought the red bags at Target in the lunch bag section for less than $2.
Wednesday, June 29, 2011
Lego DIY Party Banner
As you have been reading, we had my son's 7th birthday party this weekend. We decided to have it at a park, forget the fact that it was a million degrees outside as that was taken care of by the splash pad. The wind was horrible, this banner was actually hung up perfectly elsewhere with an additional one that said "Tyler" underneath. Unfortunately it lasted about 2 minutes before I could take a picture.
None the less, I still displayed the banner in another location. It took a few hours to make but it turned out really cute. Here is what I used:
Red Cardstock
Yellow Cardstock
X-ACTO Knife
Elmer's Glue
White Ribbon
I downloaded the Lego Font I told you about here: http://www.supersavingsense.com/2011/06/cupcake-tuesday-camouflage-cupcake-w.html
For the flags, I downloaded a free template from the lovely I Make Stuff blog http://imakestuff.typepad.com/i-make-stuff/2010/09/birthday-banner.html
I used yellow cardstock and printed out the letters with the Lego Thick font. I then cut them out with my X-ACTO knife. I glued them on using an Elmer's Paper and Fabric glue.
I punched the holes with a hole punch and strung it with $.44 ribbon from Walmart!
Labels:
Craft,
DIY,
Lego Birthday Party
Tuesday, June 28, 2011
Cupcake Tuesday: Camouflage Cupcake w/ Cupcake Bar
Today's Cupcake Tuesday isn't really a recipe, more of a sharing of a technique and a peek at our Cupcake Bar for Tyler's Birthday! This year I decided I wouldn't stress about making cupcakes, I figure at this age anyways kids would love to make their own cupcakes. I went to ABC Cake store in Phoenix and got different toppers, everything related to being a boy. Darth Vader, Storm Troopers, Light Sabers, Race Cars etc. Then I set out to get different types of toppings for the cupcakes. I also bought 2 tubs of frosting.
For the cupcakes, I made Camouflage cupcakes.
Ingredients:
I used my favorite vanilla cupcake recipe.
2 cups of flour (sifted)
1 cup of granulated sugar
2 eggs
1/4 cup butter
3/4 cup buttermilk
1 individual unsweetened applesauce
1 tsp baking powder
1/2 tsp baking powder
1/4 tsp of salt
1.5 tsp of homemade Vanilla
I divided it into thirds. I mixed a few drops of green food coloring in one bowl, brown in another and in the last one I kept it plain. I then put the colored batters into ziploc bags, cutting a corner on each back. I layered the bottom of each cupcake liner with the original vanilla flavor. I then took one color and "squirted" it to one side of inside the bottom layer. Then I took the second color and squirted it into the other side. I tried to get a camouflage look going but some of them ended up layering so I took a knife and did a little swirl in those.
The cupcake bar:
Upcycled Lazy Susan:
When I found this, it didn't look like it stood a chance to be reused again. Luckily, I had something in mind for this! I took my lovely X-ACTO knife and a 12X12 piece of Camouflage paper. I placed the paper inside the top of the Lazy Susan and gently pressed it in making a circle pattern. I then cut the circle out on my self healing mat. Once it was cut, I Mod Podged it on the Lazy Susan, then covering it with Mod Podge. I let it dry a day or so before using.
Labels:
Cupcake Tuesday,
DIY,
Lego Birthday Party
Tuesday Tip: Freezing Fresh Herbs
This Spring, I made it my mission to start an herb garden. It's actually done very well! My Basil, chives, rosemary and oregano are all doing great! The only one I had issues with was my Thyme.
When the garden started to grow, I needed a way to preserve them without having them wilt away.
I did some research and found the easiest way to do it is by freezing the herbs in an ice cube tray with water.
Here is how to do it:
- Clip herbs
- Cut/Chop to desired consistency
- Place in ice cube tray
- Fill with water
- Freeze and then use as needed when cooking
- Store in a ziploc bag in the freezer
Another way is to puree them in a food processor and fill them in the tray with olive oil.
Monday, June 27, 2011
Lego Starwars Birthday Party DIY Invites
Lego Starwars Party Invites with Legos and upcycled M&M tubes! An easy and fun DIY party invite!
This weekend we celebrated my son's 7th birthday. Right now he's into what I imagine what most 7 year olds are into: Legos, Star Wars, cars, pirates etc. I figured since he liked so much stuff, why limit it to one theme? So we did an all boy party.
Here are the invites:

I took Legos I found at Goodwill and wrote on them with an Elmer's Painters Marker (find point). I then took M&M tubes and discarded the M&M's and by discarded I mean discarded into a few more pounds but that's besides the point. I then cleaned off the labels and took electrical tape and wrapped it around the bottom. I finished them with a Star Wars Confetti circle (found a bag at Party City for less than $2) placed at the bottom with a glue spot from Elmer's.
Which then became: A Light Saber!

I then disassembled the invite, fit them into the M&M tubes making a "puzzle" for the kids to put together. I then made a more formal invite for the parents so they knew when/where the party would be.
May the force be with you.

Here are the invites:
I took Legos I found at Goodwill and wrote on them with an Elmer's Painters Marker (find point). I then took M&M tubes and discarded the M&M's and by discarded I mean discarded into a few more pounds but that's besides the point. I then cleaned off the labels and took electrical tape and wrapped it around the bottom. I finished them with a Star Wars Confetti circle (found a bag at Party City for less than $2) placed at the bottom with a glue spot from Elmer's.
Which then became: A Light Saber!
I then disassembled the invite, fit them into the M&M tubes making a "puzzle" for the kids to put together. I then made a more formal invite for the parents so they knew when/where the party would be.
May the force be with you.

Sunday, June 12, 2011
Showing Team Spirit w/ Elmer's Painters Markers (easy DIY projects)
My 10 year old is on swim team, in fact this is her third year. We were previously on another team but switched to the Stingrays this year. I wanted to surprise her with some things showing team spirit. I went to Walmart and bought Painter's Markers from Elmer's.
I made decorated flip flops (Old Navy of course) with the team's color which is purple. I took a purple Elmer's Painters Markers and created polka-dots (which I tried to make look like bubbles). The medium point Painter's Markers are really easy to do this with. I almost went on a polka-dot frenzy!
The swim team has a phrase they say "Eat My Bubbles", I wrote that with the black fine point Painters Marker on the sides. I then wrote "Stinrgrays" on the front of the flip flops. I added purple ribbon to the front, about 4 inch strips double knotted and hot glued purple flowers on the top, garnishing with a purple gemstone!
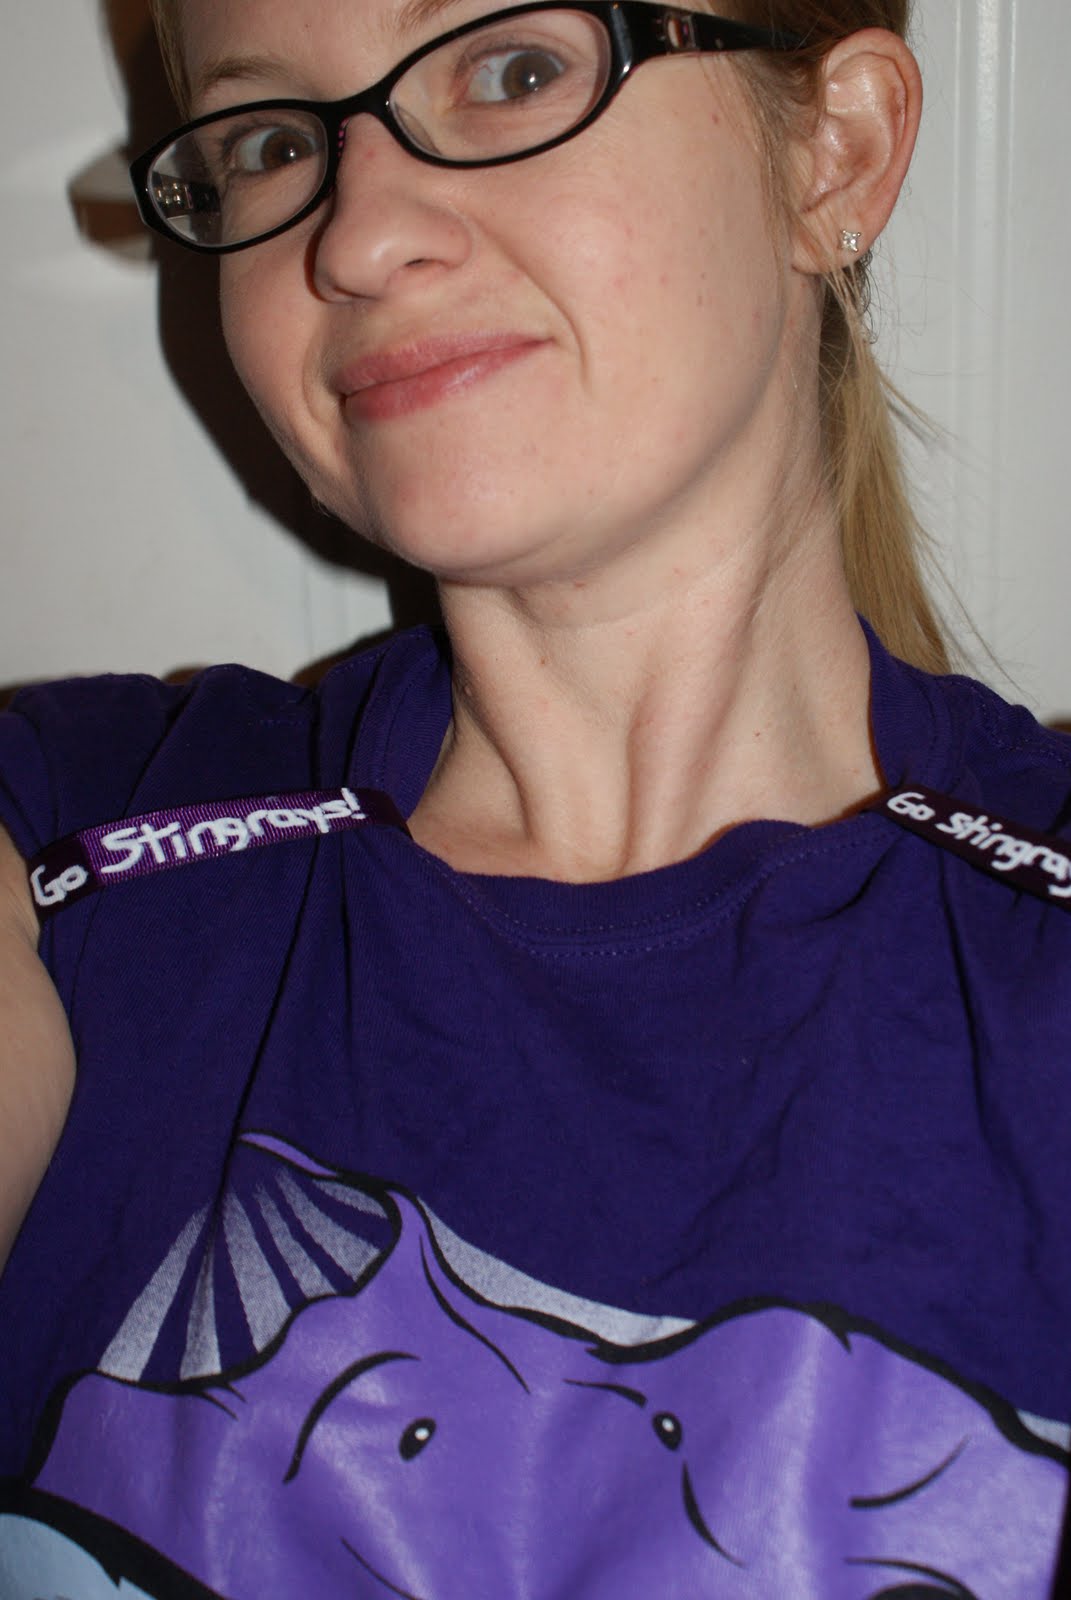
I then took some purple ribbon I bought at Hobby Lobby and wrote with the white Painters Marker "Go Stingrays". I turned this into a T-shirt sleeve tie up. It's really easy to do!
- Take Ribbon (about 1/2 inch in width, this one was 5/8 of an inch) and measure out about 10 inches.
- In the middle, take your Painter's Markers and write or design what you want.
- Then took velcro (and here I cheated, I just used a heavy duty fastener that had adhesive already on the back) and cut it to fit about 1 inch on each side of the ribbon.
- To do this, fold one side on top (about 1/2 in to 1 inch) and put the velcro on and then take and fold the the other side on the back about one inch, then adhere the velcro.
- The tie up should have velcro on opposite sides.
This is what it should look like after it's done!
After it's done, just velcro behind your sleeve!
Both of these crafts took only about 30 minutes all together!
This project has been compensated as part of a social shopper insights study for Elmer's #gluenglitter #collectivebias All opinions, photos and ideas are my own.
Thursday, June 9, 2011
Thrifty Thursday: Easy DIY Old Suitcase Upcycle Project
How to upcycle an old suitcase into a photo table/display with simple supplies like spray paint, glue gun and fabric.

Get out your hot glue guns! I'm going to show you how I was able to turn an old hard Samsonite suitcase into decor for my bedroom; a photo table.
I found a few old suitcases at the GoodWill Clearance center, I was very excited because I have been wanting to do some decor with them. Thrift stores are a great place to find them, I have also had success finding them at yard sales.
Basic Supplies:

Old Suitcase (you can see I ripped out the inside fabric)
1-2 years of Fabric (depends on size)
X-Acto knife
Hot glue gun
Dryer Sheets (this is going to help with a musty smells, put a couple sheets behind your fabric before gluing it in)
Spray Paint ~ I used Krylon Brushed Metallic, you can see my thoughts on it below)
*Ignore that lace in there, I thought I was going to put it on there but I decided not to.
I took the suitcase outside and spray painted it.
I used this

I'll be honest, I didn't care for this paint because it seemed to not coat it well. Now, it could have been the type of plastic I spray painted but it seemed to not spray right to begin with.

After letting it dry, I took and stripped out the inside fabric. I then took my fabric and measured out how much I would need to cut off by placing it inside the suitcase.
After cutting the correct amount, I took the hot glue gun and put glue inside and then quickly placed the fabric on the glue, carefully gluing the sides as well. Let it dry. DONE!

I actually painted another suitcase too, put it below this one to use as storage of sheets and pillow cases. I then put this one on top, opened it up and put pictures of my grandparents/great grandparents in there to display. I am working on putting more photos in there too :) Oh and of course there is a picture of baby "me" with my parents.
Of course it's also fun to use suitcases just as they are as storage:
I found this "hat" case for a buck at a yard sale, I use it to hold all my fabric remnants.
These I found also at the Goodwill Clearance center and use them for storage under my antique vanity:

Where I like to linky linky:

http://athriftymom.com

http://todayscreativeblog.net/get-your-craft-on-10/
Get out your hot glue guns! I'm going to show you how I was able to turn an old hard Samsonite suitcase into decor for my bedroom; a photo table.
I found a few old suitcases at the GoodWill Clearance center, I was very excited because I have been wanting to do some decor with them. Thrift stores are a great place to find them, I have also had success finding them at yard sales.
Basic Supplies:
Old Suitcase (you can see I ripped out the inside fabric)
1-2 years of Fabric (depends on size)
X-Acto knife
Hot glue gun
Dryer Sheets (this is going to help with a musty smells, put a couple sheets behind your fabric before gluing it in)
Spray Paint ~ I used Krylon Brushed Metallic, you can see my thoughts on it below)
*Ignore that lace in there, I thought I was going to put it on there but I decided not to.
I took the suitcase outside and spray painted it.
I used this

I'll be honest, I didn't care for this paint because it seemed to not coat it well. Now, it could have been the type of plastic I spray painted but it seemed to not spray right to begin with.
After letting it dry, I took and stripped out the inside fabric. I then took my fabric and measured out how much I would need to cut off by placing it inside the suitcase.
After cutting the correct amount, I took the hot glue gun and put glue inside and then quickly placed the fabric on the glue, carefully gluing the sides as well. Let it dry. DONE!
I actually painted another suitcase too, put it below this one to use as storage of sheets and pillow cases. I then put this one on top, opened it up and put pictures of my grandparents/great grandparents in there to display. I am working on putting more photos in there too :) Oh and of course there is a picture of baby "me" with my parents.
Of course it's also fun to use suitcases just as they are as storage:
These I found also at the Goodwill Clearance center and use them for storage under my antique vanity:
Where I like to linky linky:

http://athriftymom.com

http://todayscreativeblog.net/get-your-craft-on-10/
Friday, May 20, 2011
Teacher Appreciation Gifts Under $5
Easy and Frugal DIY Teacher Gifts for the end of the year!
Well the end of the school year is here and that means showing appreciation to our favorite teachers. I have put together a list of a few frugal gifts:
- Photos or a photo album of your kids through the year. I made a 5X7 at Walgreens for less than $2 that included a photo of the teacher and my kids.
- Handwritten letter or card. I think often times we want to do something great for the teachers and we think it involves a present when really it's as simple as a note of thanks. Have your kids help with decorating a card and envelope.
- Bake a batch of cookies ~ who doesn't love homemade goodies?!
- Restaurant.com Gift Certificate ~ right now you can get a $25 GC for only $3. Just enter code Plate at checkout.
- Look at Groupon or other Daily Deal sites for a deal on a massage, pedicure, movies etc. You can print it out and give it in a card.
- Flowers ~ I'm cheap but I love flower's, so usually when I buy flower's I look for the discounted ones. I actually bought some this week at Fry's for $2.49 and they have been going for about 5 days and haven't wilted yet!
If you are feeling crafty, check out what I made:
Goody Jar
This is my cherry cinnamon chocolate bark. If you haven't made a chocolate bark before, you are missing out! It is extremely easy and you can get really creative. It is found at your local grocery store, I think I get 2 pounds for less than $3 at Walmart (found in the baking aisle). All you do is melt the chocolate in the microwave and put in the ingredients you want. You can add almonds for an almond bark, or add nuts and marshmallows to make a rocky road bark. This one above is broken up "hot tamales" with a cherry candy flavoring (made by Wilton, can also be found at Walmart).
Last step is to pour the chocolate onto wax paper and let cool. For the one above after I poured out my chocolate mixture I dotted melted white chocolate across the chocolate then took a knife and made some "swirls" in the chocolate. I then took the remainder of my crushed candies and sprinkled them on top for color. Let set for about 20 minutes in a cool area or fridge to harden. Once it's hardened, break apart and put in container. I put mine in mini mason jars along and covered the lid with a swatch of fabric.
The tag is a cardboard heart painted with chalkboard paint.
I took a box out of our recycle bin and cut out heart tags by using a paper punch. I then coated them in this paint: http://shop.hobbylobby.com/store/item.aspx?ItemId=150251

This paint is only $3.69 at my Hobby Lobby and I buy it with my 40% off coupon! They also have pink and blue colors.
After painting, I let it dry then do a second coat. I should have let them dry longer because the paint scratched a little bit, so try to make these in advance before writing on them.
Tea Cup Candle:
Pictured above
I bought these supplies at Hobby Lobby (of course with coupon)
- Wax Crystals ~ $2.99
- Wicks ~ $1.99
- Scented Oil $2.99
I've always wanted to make a frugal candle but was always intimidated by the whole melting process. I was excited when I found these crystals, it is very easy to make candles with these!
Just take a wick and glue it into the bottom of a glass, I used a teacup. Use your hot glue gun, you don't want to have a highly flammable glue in your candle!
Take the wax crystal and pour in a bowl with a few drops of scented oil, mix well. Then pour the wax crystals in the candle and you are done! What is great about these is kids can easily help put these together, just be careful of the wax getting everywhere. I used a sheet of paper under the teacups so it would catch falling crystals and I could easily pour them back in the candle. You can get craftier by having the kids decorate the candle jar or teacups with an Elmer's Painters Pen.
After the two candles, I still have more than half a bag of candle wax left so I am sure the supplies I bought could make at least 4 more candles!
If giving as a gift, tie it tightly in cellophane to allow spillage to go into a bag.
What are your ideas for frugal gifts for teachers?
Subscribe to:
Posts (Atom)